
how to make a wood wedding arch?

To make a wood wedding arch, you will need several wooden posts or beams, preferably treated or weather-resistant wood. Start by measuring and marking the desired height and width of the arch. Dig holes in the ground where the posts will be placed, ensuring they are deep enough for stability. Insert the posts into the holes and secure them with concrete or gravel. Next, attach horizontal beams across the top of the posts to create the arch shape. Use screws or nails to secure the beams to the posts. Finally, sand and paint the wood to your desired finish, or leave it natural for a rustic look. Decorate the arch with flowers, fabric, or other wedding decorations as desired.
1、 Choosing the right type of wood for your wedding arch
Choosing the right type of wood for your wedding arch is crucial to ensure its durability, aesthetics, and overall success. Here's a step-by-step guide on how to make a wood wedding arch:
1. Determine the size and design: Decide on the dimensions and style of your wedding arch. Consider the theme and overall look you want to achieve.
2. Select the wood: Opt for a sturdy and weather-resistant wood species such as cedar, redwood, or oak. These woods are known for their durability and ability to withstand outdoor conditions.
3. Gather the necessary tools and materials: You will need a saw, drill, screws, sandpaper, measuring tape, and a level. Additionally, gather the wood, brackets, and any decorative elements you wish to add.
4. Cut the wood: Measure and cut the wood according to your desired dimensions. Ensure that the pieces are symmetrical and fit together securely.
5. Assemble the arch: Use brackets and screws to connect the pieces of wood. Make sure everything is level and secure.
6. Sand and finish: Smooth out any rough edges or surfaces using sandpaper. Apply a protective finish or stain to enhance the wood's natural beauty and protect it from the elements.
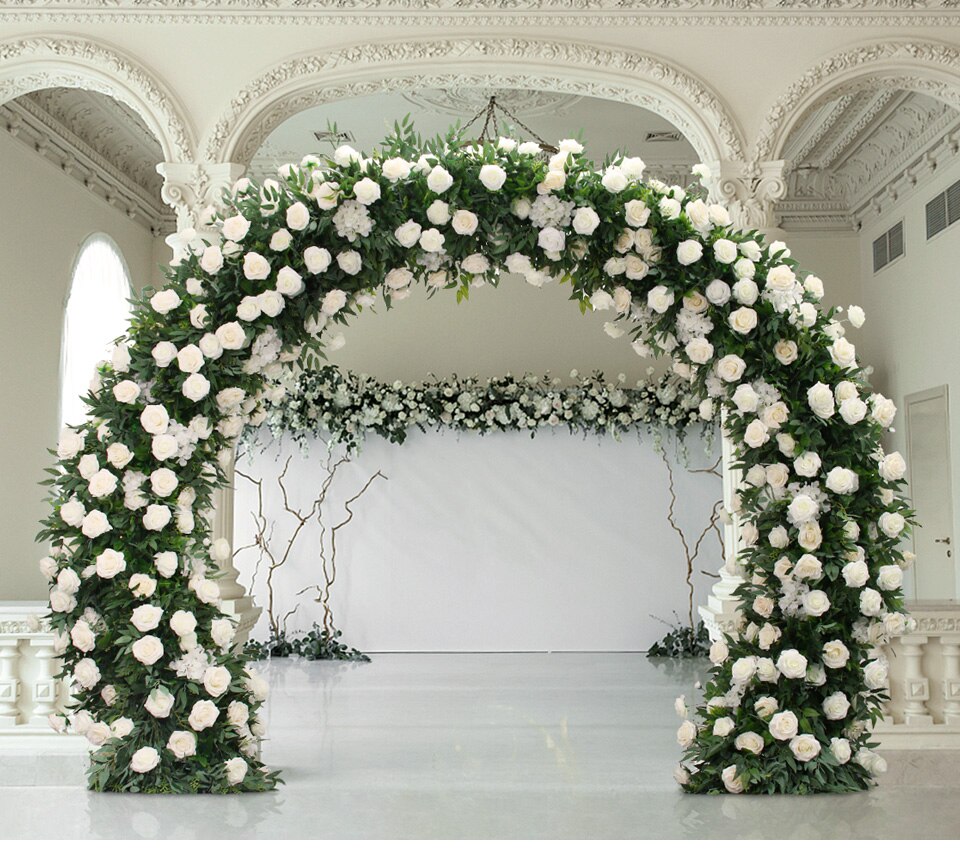
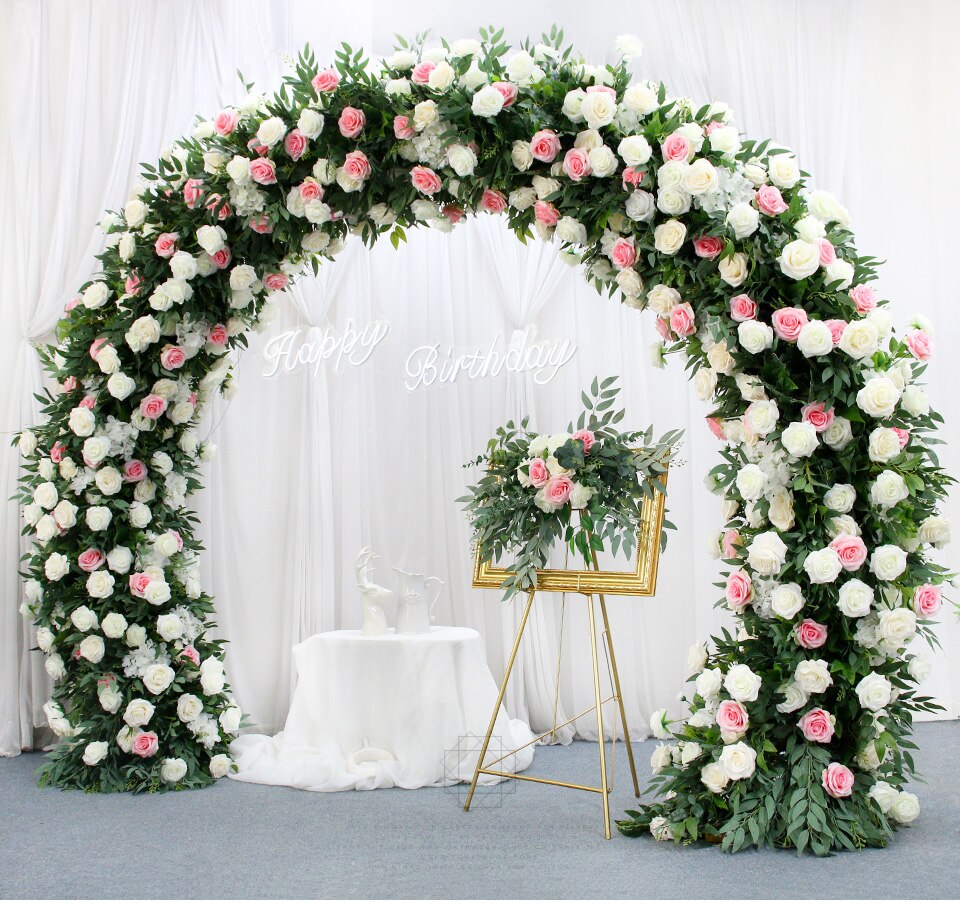
7. Add decorative elements: Consider adding flowers, fabric, or other decorative elements to personalize your wedding arch. These can be attached using zip ties or floral wire.
8. Set up the arch: Find a suitable location for your wedding arch and secure it firmly in the ground. Ensure it is stable and level.
Remember to consider the latest trends and styles when designing your wood wedding arch. Minimalist and bohemian-inspired arches are currently popular, featuring clean lines and natural elements. Additionally, incorporating sustainable and eco-friendly practices, such as using reclaimed wood, is gaining popularity in the wedding industry.

2、 Measuring and cutting the wood for the arch frame
To make a wood wedding arch, the first step is to measure and cut the wood for the arch frame. This is an essential part of the process as it determines the size and shape of the arch.
Start by deciding on the desired height and width of the arch. Measure and mark these dimensions on the wood, ensuring that the measurements are accurate. Use a measuring tape and a pencil to make precise marks.
Next, using a saw, carefully cut the wood according to the marked measurements. It is important to use a saw that is appropriate for the type of wood being used, ensuring clean and accurate cuts. Take your time and follow the marked lines closely to achieve the desired shape.
Consider the latest point of view when making the wood wedding arch. Nowadays, there are various design options available for wedding arches. Some couples prefer a simple and minimalist look, while others opt for more elaborate and decorative designs. Take into account the overall theme and style of the wedding when deciding on the shape and size of the arch.
Additionally, consider using reclaimed or sustainable wood for the arch frame. This not only adds a unique and rustic touch to the wedding decor but also aligns with eco-friendly practices.
Once the wood is cut, sand the edges and surfaces to ensure a smooth finish. This will prevent any splinters or rough spots that could potentially cause harm. Finally, assemble the arch frame using screws or nails, making sure it is sturdy and secure.
Remember, safety should always be a priority when working with tools and equipment. Wear appropriate protective gear and follow all safety guidelines to avoid accidents.
3、 Assembling and securing the arch frame
To make a wood wedding arch, you will need to follow a few steps. One of the crucial steps is assembling and securing the arch frame. Here's a guide on how to do it:
1. Gather the materials: You will need four wooden posts, preferably 6-8 feet tall, and two wooden beams for the top of the arch. Make sure the wood is sturdy and weather-resistant.
2. Measure and mark: Decide on the desired height and width of your arch. Measure and mark the spots where the posts will be placed. Ensure that the distance between the posts is equal for a balanced look.
3. Dig holes: Dig holes in the ground where you marked the spots for the posts. The depth of the holes should be around 1-2 feet, depending on the height of your posts. This will provide stability to the arch.
4. Insert the posts: Place the wooden posts into the holes and fill them with concrete or gravel to secure them firmly. Use a level to ensure that the posts are straight and aligned.
5. Attach the top beams: Once the posts are secure, attach the wooden beams across the top of the arch. You can use screws or brackets to secure them in place. Make sure they are level and evenly spaced.
6. Finishing touches: Sand down any rough edges and apply a coat of weather-resistant sealant or paint to protect the wood from the elements. You can also add decorative elements such as flowers, ribbons, or fabric to enhance the aesthetic appeal.
From a modern perspective, you can also consider using alternative materials such as PVC pipes or metal rods for a more contemporary look. Additionally, you can incorporate LED lights or other lighting fixtures to create a romantic ambiance for evening weddings.
Remember to always prioritize safety when assembling and securing the arch frame.
4、 Adding decorative elements to the wood wedding arch
To make a wood wedding arch, you will need a few materials and tools. Here is a step-by-step guide to help you create a beautiful and personalized wood wedding arch:
1. Materials:
- Four wooden posts or branches of equal height
- Wooden boards or planks for the arch frame
- Screws or nails
- Sandpaper
- Wood stain or paint (optional)
- Decorative elements (flowers, fabric, lights, etc.)
2. Design and Measurements:
- Decide on the size and shape of your arch. Consider the space available and the overall theme of your wedding.
- Measure and mark the desired height and width of the arch on the wooden posts and boards.
3. Assembly:
- Attach the wooden boards or planks to the posts to create the arch frame. Use screws or nails to secure them firmly.
- Sand the wood to smooth any rough edges or surfaces.
- Apply wood stain or paint to enhance the appearance and protect the wood from weather elements if desired.
4. Adding Decorative Elements:
- Once the basic structure is complete, it's time to add decorative elements to make the arch more visually appealing.
- Consider using fresh flowers, fabric drapes, or greenery to adorn the arch. You can attach them using floral wire or zip ties.
- Incorporate string lights or fairy lights to create a romantic ambiance for evening weddings.
- Personalize the arch with signs, monograms, or other decorative elements that reflect your style and wedding theme.
Remember to consider the latest trends and styles when adding decorative elements to your wood wedding arch. For example, boho-inspired weddings often feature macrame or dreamcatchers, while rustic weddings may incorporate burlap or twine. Ultimately, the design choices should reflect your personal taste and create a stunning backdrop for your special day.


Leave your comment